Showing posts with label beauty. Show all posts

Sunday, 28 September 2014

Autumn Skincare Routine: Discovering Burt's Bees

I absolutely love the season change between summer and autumn. I get all excited just thinking about cosy nights, woolly blankets, comfy pjs, snuggly slippers and yummy hot chocolates. The change of season means a change in lifestyle, and that includes skincare.

In the summer, I like to keep things light. I have oily skin, which is a nightmare in hot weather. When the leaves start to fall and the air becomes cooler, my skin really appreciates richer products.

I’ve never used any Burt’s Bees products before, but these two products grabbed my attention as I saw they were over 99% natural.


IMG_3576.jpg


The first is the Soap Bark & Chamomile Deep Cleansing Cream. Chamomile is known to help you to relax, which was perfect for me while settling down into a new job. And as it happens, soap bark is just a fancy name for shea butter, which is great for protecting your skin from the environment.


When applying this for the first time, I was initially wowed by the scent. It smells like a cross between Palma Violets, Love Hearts and Fizzers - three of my favourite childhood sweets! The second thing I loved was its creamy texture. It’s moisturising, but also fresh due to the scent.


IMG_3577.jpg


In the evening, I usually take my makeup off with some wipes before applying the cleanser and leaving it on for around fifteen minutes. This gives it time to really soak into the skin. When leaving it on for longer, it feels cooling and does tingle slightly. Then after washing it off I can immediately see that it de-puffs my face, leaving it bright and radiant.

The second product I purchased was the Burt’s Bees Radiance Day Cream. Like I mentioned earlier, I do have oily skin so I tend to find night creams too heavy for me. Therefore, I use a day cream as a moisturiser, night and day. I went for the radiance cream as I wanted my skin to continue to look healthy going into autumn/winter, when it’s not as easy to eat fruit all day.  


IMG_3578.jpg


The cream’s main ingredient is royal jelly, which is said to normalise the fat secretion of skin glands to reduce oiliness. It also helps with anti-aging. I apply this morning and night after I’ve cleansed, and love how it moisturises my face without overloading it with oils. My skin seems to drink up and then perk up!


IMG_3580.jpg


Have you switched up your skincare routine for autumn?


Sunday, 11 May 2014

Life Changer #2 - Real Techniques Miracle Complexion Sponge

Today I have another life changing product to show you. It's Real Technique's Miracle Complexion Sponge. I am already a fan of Real Techniques make-up brushes and was on the lookout for a drugstore dupe of the over-priced £16 sponge called the Beauty Blender.


Like the Beauty Blender, this sponge is a foundation and concealer applicator that you can pick up from Boots for just £5.99. You just dot your base on your forehead, nose, cheeks and chin and then use the sponge to dab it in. 


It has a rounded body used for big areas such as the forehead and cheeks, a pointed tip for covering any acne or hyper-pigmentation and a flat side to get in the grooves around the nose and eyes.


The sponge blends flawlessly. I haven't experienced any sliding foundation or pore seeping concealer whilst using this. My base now appears more natural with all the tell-tale signs of harsh lines gone. It has really changed the way my complexion looks every day.

So there it is- my second make-up bag staple of the year so far!


Saturday, 12 April 2014

Life Changer! - Topshop's Glow


I'm back with a bang! (and an amazing product). After watching Becca Rose talk about this on YouTube, I had to buy it and see for myself. It's Topshop's Glow- a lovely pearlescent highlighter.


I popped into the Cardiff store not once, not twice but three times to get my hands on Glow- but no luck. I was extremely disappointed to be going on holiday to Cornwall without being able to try it out. But funnily enough, whilst I was checking out Truro (what an adorable little city!) I walked into the most teeny tiny Topshop I'd ever seen and there it was! The product comes in two shades- 'Polished' and 'Gleam'. I purchased the shade 'Polished' which is the lightest of the two.


I was so excited to try it, I cracked it open as soon as I got back to the car. My first impression when I looked in the little car mirror was pretty much an 'ooooooo'. The product was creamy and went on top of my foundation like a dream. The champagne colour with pearly pink reflects was perfect for my pale skin. I applied it to the top of my cheek bones, down my nose and above my cupid's bow and it definitely gave my face a glow.  


The downside to the product is that it does separate, but I feel this is due to my slightly oily skin. Once I began to apply the highlighter underneath my trusty Rimmel Stay Matte Pressed Powder rather than on top, the product lasted all day without melting away into my pores. It is a bit on the pricey side at £9 but compared to Benefit's High Beam at £19.50- it's a winner. 

It has definitely changed the way my face looks. And used in conjunction with Benefit's Hoola bronzer I've managed to fake cheekbones! So there you have it, what an amazing find and definitely a new make-up bag staple. 


Saturday, 20 July 2013

How To Get Perfect Skin #4

Hello Sunshines! Final step in my How To Get Perfect Skin series.

Step #4 - Powder


Okay so you've already got primer on to make sure your make-up doesn't budge, but using a pressed powder on top of your concealer and foundation really sets everything as well as keep shine at bay. I recommend Rimmel's Stay Matte Long Lasting Pressed Powder. If you have oily skin, this is a lifesaver! I keep this on me at all times in case my face starts to look like a shine fest. 

Tip! 

While out an about, apply with a clean eyeshadow brush. You get more control over where the powder specifically goes. It also banishes dark circles under the eyes! 

I hope you enjoyed my How To Get Perfect Skin series and I hope I've helped! 


Sunday, 23 June 2013

How to get Perfect Skin #3

Hi! This is step three in my 'How to get Perfect Skin' series. Make sure you read step one and step two!

Step #3 - Concealer


This is the one beauty product that every girl needs (yes, this is a need) in her make-up bag. This concealer is called Lasting Perfection by 'Collection' (used to be Collection 2000). It claims to last 16 hours. I have yet to put this to the test (because I need my beauty sleep) but I can say it does last all day long. I've even gone surfing and it's kept my acne scarring from showing through. 


First of all, you need the right shade. There has been a few sunny days in Wales recently, so my hands have tanned, but oddly (and unfortunately) my face never does so I go for the lightest shade which is 01 'Fair'. I also find that I like concealers slightly lighter, especially if your using it for your under-eye baggage because it brightens like a real-life Photoshop! 

I'd say the texture is quite creamy and velvety. It is thick but that's definitely what I want in a concealer- it has to conceal!


Here it is in action! Definitely faking the 'perfect skin' because I have broken out like crazy over this last week! So there's me and my lovely fiancĂ©, Andrew who's turning twenty this week. This was before going out for an early birthday meal with our friends. This concealer is my life-saver! 

Keep checking - the fourth and final step will be up soon! 


Monday, 17 June 2013

How to get Perfect Skin #2

Hello guys! This is post two in my 'How to get Perfect Skin' series so if you want to see step one click here.

Step #2 - Foundation


Shade 51 - Vanille Claire

After applying my primer, I go straight in with foundation. I used to use the regular Bourjois Healthy Mix Foundation which was my go-to throughout sixth form but then they brought out this lovely bottle of delight. I've been using this for about a week and I love it because it feels so much lighter on the skin, which is perfect for summer time and for people who hate cakey faces. 


Because this is a 'gel formula', I expected it to be more of a gel-like consistency, but it just feels like a lighter version of a foundation (can you tell in the picture above?). Some people say the coverage isn't as good as the regular foundation, but I honestly think it covers just as well without blocking your pores and producing breakouts in the first place! 

Bourjois call it a 'treatment' that uses '3 super fruits - lychee, goji and pomegranate'. It's supposed to 'erase signs of fatigue, even out the complexion and revive its radiance'. It even claims to give us '+69% more radiance after 4 weeks of use!' I'm pretty sure they're not lying because I've had tonnes of compliments on my skin recently. I definitely haven't had as many breakouts as I usually do which is such a good sign. 

It's semi-matte so people with extremely oily skin should avoid this, but because I'm middle of the road with my oil-levels, it just gives me a radiant finish.  

Keep your eyes peeled for Step #3 of How to get Perfect Skin. 


Friday, 14 June 2013

How to get Perfect Skin - #1


Hiya lovelies! I'll be doing a mini-series of posts on how to get the perfect skin. Everyone wants flawless skin (but it's very hard to come by naturally!) so over the series I will show you a variety of products that will help you fake it. 


Step #1 is extremely important and if you use this baby it'll make a huge difference! This lovely product is Rimmel's Fix and Perfect Pro Primer. It claims to have 5 in 1 results: 'smoothes, resurfaces, brightens, mattifies and protects' and I agree with all five. 

I use this after cleansing and moisturising using Soap & Glory's Peaches and Clean and Clear Here (you can see a full review of both products here).

When you first squirt it out it actually resembles a moisturiser. Its consistency is thick and creamy (as you can see in the image above) but it really sinks into the skin and enhances it. If I didn't have acne scarring, I'd be happy wearing this without any foundation. It leaves the skin glowing but is also a mattifier. It's a bit like a thick BB cream without colour. 

Downside is the quantity. There's only 30ml in a tube for £6.99, but you don't need a lot of product to cover your face. Upside is that it does what it says on the tin (or tube) and it keeps your make-up in place all day long, which is amazing because if you're like me you either can't be bothered or don't have time to smother foundation on twice in one day!

Keep your eyes peeled for Step 2! 


Monday, 3 June 2013

Manic Monday - A Trip to Oxford with Nails Inc


Hello Guys and hello June! Summer is here! And on this Manic Monday I would like to bring you a review of  a nail varnish by Nails Inc. 


I've tried bits and bobs of Nails Inc. Well, only the freebies that have come with magazines. Because, lets be honest, Essie's £7.99 for a nail varnish is a doubtful purchase, never mind a ridiculous £11!


But me being me (always out for bargains), found this lovely set of four for £14.99 at TKMaxx! Obviously every TKMaxx is different, but it's definitely worth popping into a few local stores to find these babies. There were a variety of different sets, but I was drawn to this pastel quad. I did pick up another set of neons for my teenage sister because I just couldn't leave them. I've tried out one shade so far which is called Oxford.


Colour

How exciting! This is the most gorgeous sky blue colour. Every time I look at my nails, I think of holidays and sun, and pools, and beaches, and laying on lilos, and everything else associated with summer.

Consistency

I was actually quite surprised. This isn't as thick as Essie, but it is still quite meaty. I like to put on 2-3 coats. It glides on nicely and the application brush is not too small or too big. It is quite easy to get on the skin though, so always have a nail varnish remover pad at hand.

Finish

I was so proud of myself when my nails had dried. They actually look salon professional. It is such a sleek, shiny finish that really pops, despite me being fair. I think this would look great on all skin tones.

Wearability

This isn't actually too bad and I didn't even use a top coat (slapped wrist). It lasts about 2-3 days before it starts to chip, but even then its minuscule amounts.

So...

Due to the wearability and application not being as good as Essie's, I would give this 4 stars, just! The colour and finish really did win me over.


Friday, 3 May 2013

Play Date - Essie Nail Lacquer Review


Hello! I'm excited to tell you about another Essie Nail Lacquer. This is my second ever try of Essie. I was so impressed with Jam 'n' Jelly, I had to go and get another Spring/Summer shade. After standing at the counter for a good ten minutes, I finally went for the shade 'Play Date'.


I've had a tonne of compliments on the colour. Lots of people have said it reminds them of the purple they used in nursery or infant school. It's a perfect pastel that isn't too light and isn't too dark, And just like Jam 'n' Jelly, it's really hard to chip. I've had this colour on my nails for five days without having to do a single touch-up. I find the only downside to these perfect polishes is they do stain your nails. I definitely need to invest in a good base coat. As for application - it applies just as well as Jam 'n' Jelly. In fact,  the more I've been painting my nails the better I'm getting. This is another 5 star product and I can't wait to try out more shades.


Friday, 22 March 2013

Essie Jam 'n' Jelly Nail Polish Review

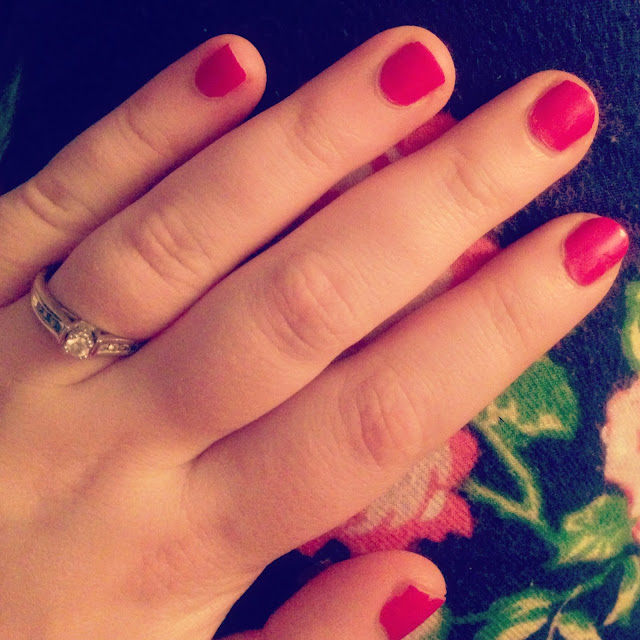
This is the first Essie nail polish I've ever tried. I always go through phases when it comes to nail polish because I'm not very good at painting them without it looking like I'd trusted a four year old with my manicure. I've never been able to get my nails looking professional until I found this product. I'd seen Essie nail polishes been raved about online but I knew they were hard to get hold of here in the UK. So when I saw they had come to Boots I had to pick one up! It's a bit pricey for a nail polish at £7.99 (when I told my Nan she thought it was ridiculous) BUT I have to say it was very worth it.

Gold star number one is the colour. I picked the shade Jam 'n' Jelly because it looked like a very wearable bright colour that would last me throughout the Spring and Summer, and I love pink. The colour is extremely similar on as it is in the bottle, but the more coats you apply the darker it becomes.

Gold star number two is application. No more messy four year old manicures for me! Even with my shaky hands it was extremely easy to apply. I applied two coats, and even though some stuff did get on my fingers instead of my nails (it inevitable), it's extremely easy to just peel off when the polish is dry. 

Gold star number three is staying power. Usually, most nail varnishes chip on the first day but this has lasted seven whole days! It has lasted through my guitar and piano playing, my ballet classes and my writing workshops and only now after a whole week is it starting to chip. 

This is a 5 star product for me, so I will be purchasing this in another shade (and then probably another one). Next mission is to find a pinky nude for my ballet show.